Michael

Construction Begins
Started by
MHamburg
, Apr 23 2013 04:04 PM
171 replies to this topic
#1

MHamburg
-

-
topic starter
- Posts: 2,810
- Joined: 21 Jun 2006
Mercury-Atlas
Posted 23 April 2013 - 04:04 PM
So the snow has finally melted and the ground has thawed! I have begun my modest but long-desired warm room extension. Here is a shot of the dimensions and when laid out, I realized it will be the size of a bathroom (but will not function as such.)
Michael
Michael

#2
roscoe
-
-

- Posts: 12,403
- Joined: 04 Feb 2009
curmudgeon
Posted 24 April 2013 - 08:14 AM
Looks like a good start! Now, just photoshop a couple of pieces of concrete into that photo, and you're good to go!
(if only it were that easy......)
R
(if only it were that easy......)
R
#3
dmdouglass
-
-

- Posts: 2,128
- Joined: 23 Dec 2007
Vanguard
Posted 24 April 2013 - 02:22 PM
Well... based on the photo showing the obs off the ground... i doubt he will be pouring concrete...
And what a photo !! How about a wider view, from back a ways... It appears as if that is a beautiful location !!
And what a photo !! How about a wider view, from back a ways... It appears as if that is a beautiful location !!
#4
MHamburg
-
-
topic starter
- Posts: 2,810
- Joined: 21 Jun 2006
Mercury-Atlas
Posted 24 April 2013 - 08:31 PM
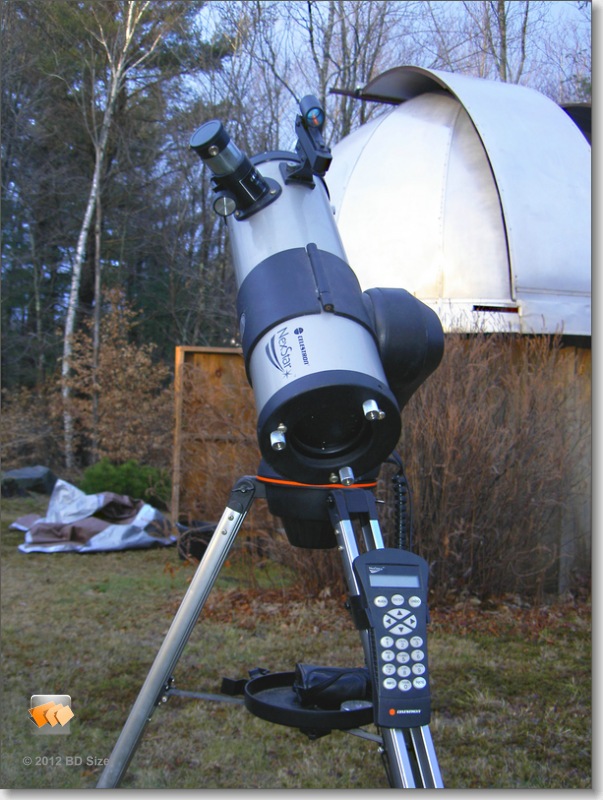
Thanks for the comments! I am running two beams from a ledger attached to one of the sides of my octagonal observatory that will be supported on the outlier end by two concrete piers. The plan is to connect the warm room to the obs with an internal (insulated with window)door. (BTW, I suffer from Arizona envy.) The attached photo was for selling this scope, (I did. I have a C11 Edge HD that I love) but you get an idea of the observatory.
Michael
Michael
Attached Thumbnails
#5
MHamburg
-
-
topic starter
- Posts: 2,810
- Joined: 21 Jun 2006
Mercury-Atlas
Posted 07 May 2013 - 05:40 PM
Small update: This is definitely going to take longer than I had hoped. These old muscles can no longer be tortured as I used to do. Anyway I forgot how hard it is to back fill a hole by hand. I am hoping that once I get out of the dirt, I will have an easier time.
Michael
Michael
Attached Thumbnails

#6
Aquarist
-

-

- Posts: 1,041
- Joined: 27 Aug 2012
Apollo
Posted 09 May 2013 - 04:05 PM
My muscles ache responsively when thinking about this project.
#7
MHamburg
-
-
topic starter
- Posts: 2,810
- Joined: 21 Jun 2006
Mercury-Atlas
Posted 10 May 2013 - 10:17 AM
Thanks a lot, Steve.
Michael
Michael
#8
MHamburg
-
-
topic starter
- Posts: 2,810
- Joined: 21 Jun 2006
Mercury-Atlas
Posted 16 May 2013 - 04:34 PM
Small step 2: The two piers are in and I have survived!! As soon as they have fully cured, I will start the floor framing. It feels good to be out of the ground.
Michael
Michael
Attached Thumbnails

#9
MHamburg
-
-
topic starter
- Posts: 2,810
- Joined: 21 Jun 2006
Mercury-Atlas
Posted 10 June 2013 - 03:07 PM
Just a few new photos for the update.
Attached Thumbnails

#10
MHamburg
-
-
topic starter
- Posts: 2,810
- Joined: 21 Jun 2006
Mercury-Atlas
Posted 10 June 2013 - 03:09 PM
Joists in place. (BTW: all framing is pressure treated for the floor framing.)
Attached Thumbnails

#11
MHamburg
-
-
topic starter
- Posts: 2,810
- Joined: 21 Jun 2006
Mercury-Atlas
Posted 10 June 2013 - 03:11 PM
Pressure treated ply for the bottom layer of the insulation "sandwich" that will be the floor.
Attached Thumbnails

#12
MHamburg
-
-
topic starter
- Posts: 2,810
- Joined: 21 Jun 2006
Mercury-Atlas
Posted 10 June 2013 - 03:14 PM
2" of foamboard insulation which will be covered with 5/8" exterior ply for the floor (later to be carpeted.)I will post a couple of pics of the electrical extension tomorrow. Now I have to figure a way to stop the rain. Thanks for looking.
Michael
Michael
Attached Thumbnails

#13
jazle
-
-
- Posts: 158
- Joined: 20 May 2010
Vostok 1
Posted 10 June 2013 - 06:06 PM
Take a vacation. Skies always clear up at home when you're away. Looks good. That insulation is wonderful stuff. I used the 1" stuff on the inside of a Rubbermaid Shed and it made a remarkable impact on keeping it cool during the day and holding in the warmth at night. 2" will be even better!
#14
MHamburg
-
-
topic starter
- Posts: 2,810
- Joined: 21 Jun 2006
Mercury-Atlas
Posted 11 June 2013 - 08:52 AM
Thanks, Jason. I forgot what vacation means.
Attached Thumbnails

#15
MHamburg
-
-
topic starter
- Posts: 2,810
- Joined: 21 Jun 2006
Mercury-Atlas
Posted 11 June 2013 - 08:53 AM
Another angle:
Attached Thumbnails

#16
roscoe
-
-
- Posts: 12,403
- Joined: 04 Feb 2009
curmudgeon
Posted 11 June 2013 - 07:56 PM
Good idea to put ply under your foam, Michael. It'll help a lot to keep critters from making cushy pink nests.....
Russ
Russ
#17
MHamburg
-
-
topic starter
- Posts: 2,810
- Joined: 21 Jun 2006
Mercury-Atlas
Posted 12 June 2013 - 04:23 PM
And you know how many critters would love to do just that! The electrician got a deal on this service panel. I guess I could run a big cooler off this service. Michael 
Attached Thumbnails

#18
MHamburg
-
-
topic starter
- Posts: 2,810
- Joined: 21 Jun 2006
Mercury-Atlas
Posted 12 June 2013 - 04:27 PM
Look at the poor ground after all this rain (with more on its way!)
Michael
Michael
Attached Thumbnails

#19
roscoe
-
-
- Posts: 12,403
- Joined: 04 Feb 2009
curmudgeon
Posted 12 June 2013 - 07:42 PM
I'm guessing a 100-amp/20 circuit service will do, but only for a modest observatory.......Mt Palomar or something.......
Looks like a few days of dry weather coming over the weekend..... hopefully you'll be able to see the bottom of your trench again.
R
Looks like a few days of dry weather coming over the weekend..... hopefully you'll be able to see the bottom of your trench again.
R
#20
MHamburg
-
-
topic starter
- Posts: 2,810
- Joined: 21 Jun 2006
Mercury-Atlas
Posted 13 June 2013 - 09:59 AM
I actually got the trench back-filled late yesterday in anticipation of today's rain.
Michael
Michael
#21
MHamburg
-
-
topic starter
- Posts: 2,810
- Joined: 21 Jun 2006
Mercury-Atlas
Posted 01 July 2013 - 08:07 PM
A brief update: I was able to put on the other layer of the floor before it rained (yet again!) I also finished the back filling of the electrical trench along with reseeding. I'm afraid I won't need to water this week.
Michael
Michael
Attached Thumbnails

#22
HunterofPhotons
-
-

- Posts: 1,652
- Joined: 26 Apr 2008
Surveyor 1
Posted 02 July 2013 - 09:59 AM
Hi Michael,
For future reference on your next construction project, plywood is strongest when its outside grain is laid perpendicular to floor joists, rafters, etc.
dan k.
For future reference on your next construction project, plywood is strongest when its outside grain is laid perpendicular to floor joists, rafters, etc.
dan k.
#23
tim57064
-
-

- Posts: 1,709
- Joined: 23 Aug 2012
Surveyor 1
Posted 02 July 2013 - 10:51 AM
More than likely you already thought of this, yet since you have insulation sandwiched between 2 layers of plywood,I hope you covered the top layer with some plastic before it rained again. Moisture will be trapped between the layers and promote mold and rot.
#24
MHamburg
-
-
topic starter
- Posts: 2,810
- Joined: 21 Jun 2006
Mercury-Atlas
Posted 03 July 2013 - 08:00 AM
I have invested in more plastic tarps in this one season than in all the years prior. Dan, yeah but this gave me the most surface and fewest cuts for the bucks, and the width is only about 66".
Michael
Michael
#25
MHamburg
-
-
topic starter
- Posts: 2,810
- Joined: 21 Jun 2006
Mercury-Atlas
Posted 09 August 2013 - 02:07 PM
Update: I have actually begun the framing of the warm room. Picture 1 shows the existing wall I removed to connect the buildings.
Michael
Michael
Attached Thumbnails

CNers have asked about a donation box for Cloudy Nights over the years, so here you go. Donation is not required by any means, so please enjoy your stay.

Recent Topics
-

-

-
 We have had conversations about how much cloud cover, but what chance of rain?
DanMiller - Today, 08:10 PM
Beginning Deep Sky Imaging
-
 Friday Saturday May 11~ "Best Chance To See Aurora In Ages" -Strong Aurora Alert for northern USA, Canada, Europe
moefuzz - Today, 07:53 PM
Science! Astronomy & Space Exploration, and Others
-

-

-

-

-
-


