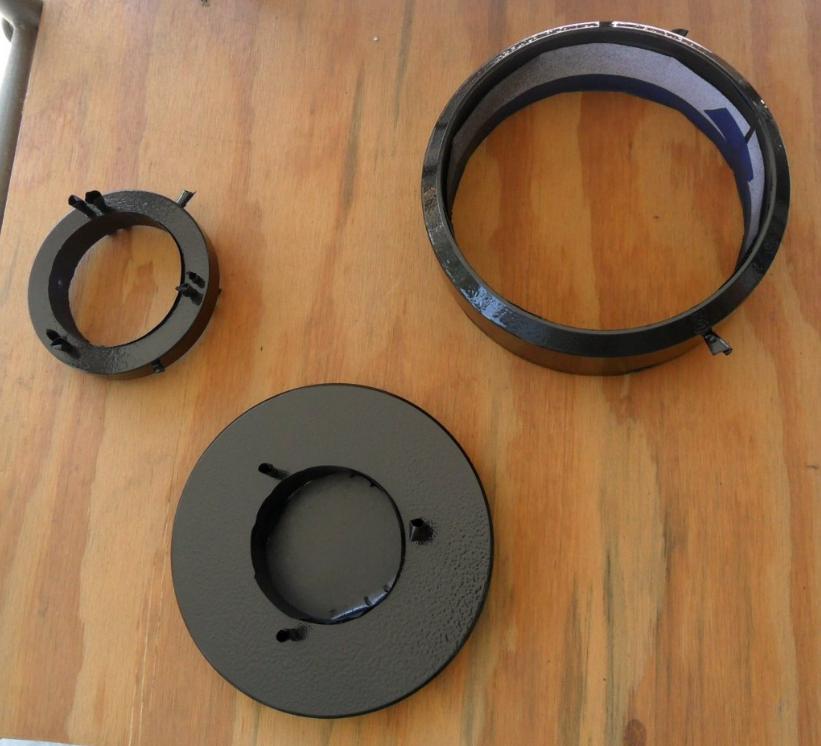
Again... I can email you the original large size design diagrams if you like. If you decide to use these designs, please revise the measurements according to your build parameters.
Mel

Surveyor 1


Posted 26 May 2012 - 10:07 PM

Explorer 1

Posted 28 May 2012 - 08:00 AM
Surveyor 1
Posted 29 May 2012 - 08:27 PM
Surveyor 1
Posted 30 May 2012 - 10:11 PM
Explorer 1
Posted 31 May 2012 - 08:11 AM
Surveyor 1
Posted 31 May 2012 - 10:34 AM
Explorer 1
Posted 02 June 2012 - 08:16 PM
Mariner 2


Posted 17 June 2012 - 06:58 PM
Mercury-Atlas
Posted 19 June 2012 - 08:16 AM
Surveyor 1
Posted 20 June 2012 - 08:50 PM

Surveyor 1
Posted 20 June 2012 - 09:02 PM
Surveyor 1
Posted 20 June 2012 - 09:09 PM
Mariner 2
Posted 21 June 2012 - 05:24 AM
Hey gmazza!
Is this a question for me or Marty?
Mel
Anachronistic

Posted 22 June 2012 - 10:02 AM
. I'm wondering if a focuser with 4" of travel would allow you find a position to use a bino or a diagonal without extensions?
Regards,
Jim
Surveyor 1
Posted 22 June 2012 - 08:20 PM
Hey gmazza!
Is this a question for me or Marty?
Mel
Hi Mel,
The question is for you, I am buiding a cell for the 108mm 8.5 and don't know the measure to be used in the retaining ring.
Best
Gustavo
Mariner 2
Posted 23 June 2012 - 06:55 AM
Surveyor 1
Posted 25 August 2012 - 01:49 PM

Surveyor 1
Posted 25 August 2012 - 01:55 PM

Surveyor 1
Posted 25 August 2012 - 02:02 PM

Surveyor 1
Posted 25 August 2012 - 04:14 PM

Explorer 1
Posted 25 August 2012 - 08:56 PM
Surveyor 1
Posted 25 August 2012 - 10:46 PM
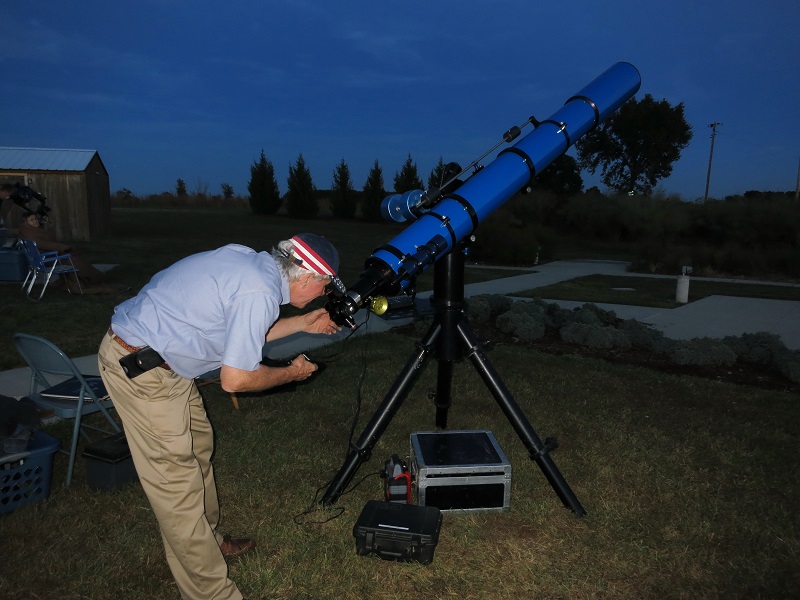
That's a nice aestheic lenght on that dew shield, Mel.
marty
Surveyor 1
Posted 02 September 2012 - 07:49 PM

Explorer 1
Posted 03 September 2012 - 11:01 AM
Vanguard
Posted 03 September 2012 - 11:55 AM
 :
:

FCervini - Today, 03:33 PM
Beginners Forum (No Astrophotography)
EricTheCat - Today, 03:28 PM
DSLR, Mirrorless & General-Purpose Digital Camera DSO Imaging


 Cloudy Nights LLC Cloudy Nights Sponsor: Astronomics |

