Reviving an old observatory or start over?
#1

Posted 14 January 2013 - 10:34 PM
Problem 1: Dirt floor. For this app, do you think I need to poor a floor, or can I just use patio stones? I could either do the entire floor or leave where the rocker box sits bare dirt.
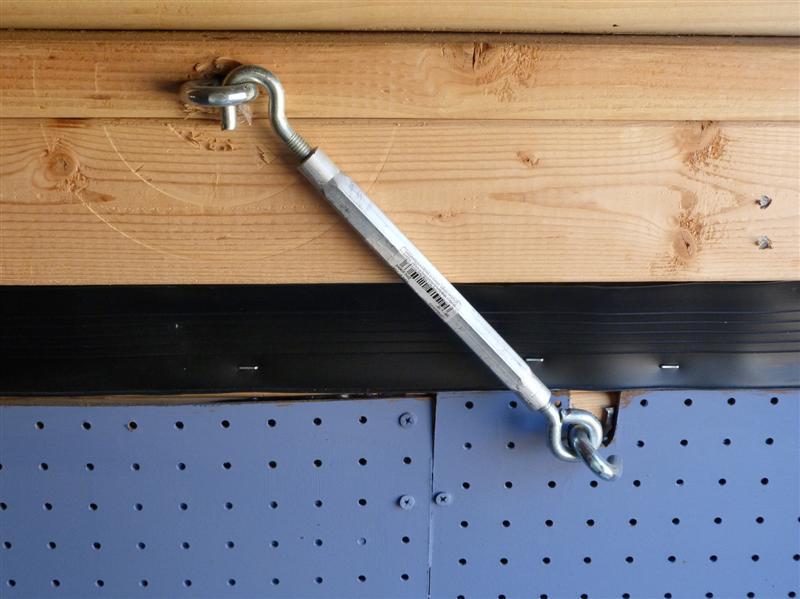
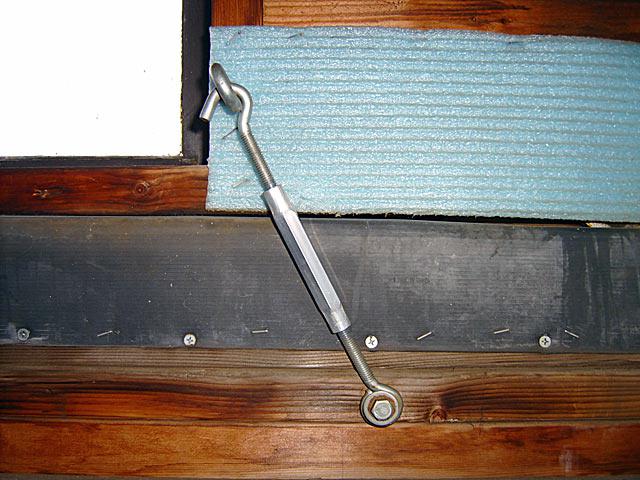
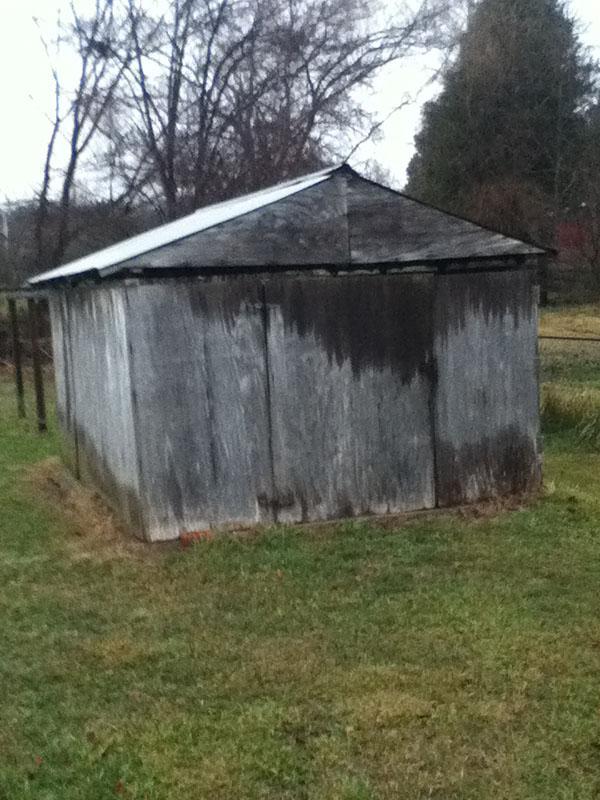
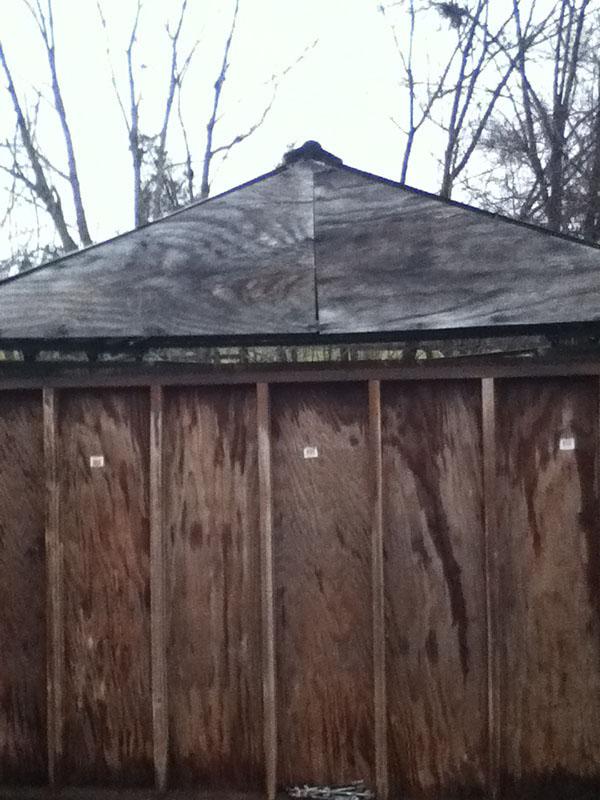
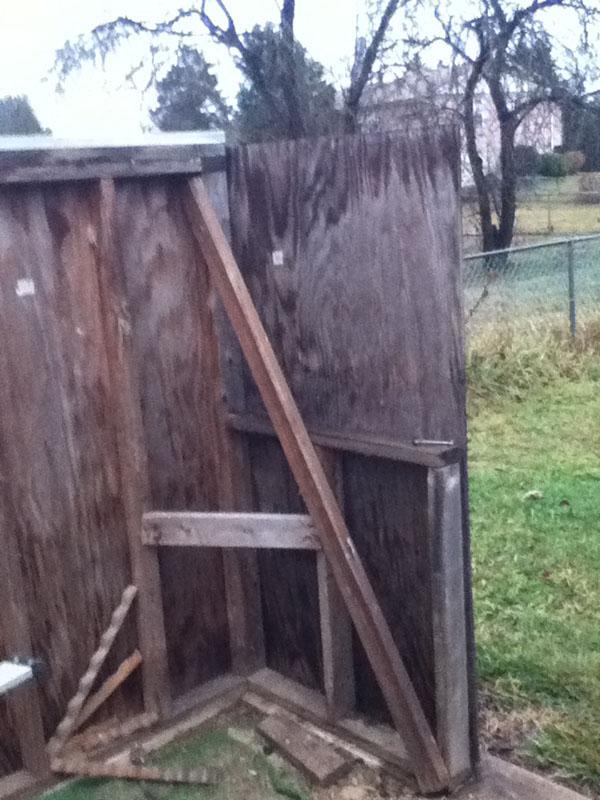
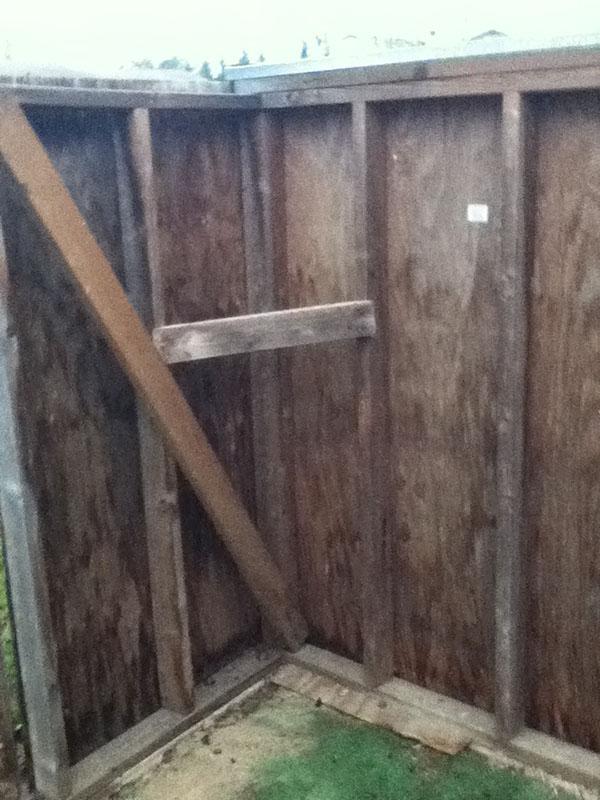
Problem 2: The roof rolls off to the North. The door into the shed is to the South. Because I wanted a low south view, I built one half of the wall up only half way. I can then open up the wall on that side. Between that and the door, if I time things right I can get a view pretty far South. The problem is that because of that, the two side walls are not tied together at all on the South end. The result is predictable, the outside walls want to shift out. One possible solution is a wire cable with a turnbuckle between the two sides.
Problem 3 - My door was just double layer plywood with some hinges. a) the hinges are not heavy duty enough. b) the door is totally falling apart. c) The wall it hinges to shifts somewhat, again because there is no cap plate, etc. The door is quite wide and needs to be to get the 20" in and out (4 feet wide). I'm thinking about again building one out of plywood, but this time using 1x1s inside and then skinning it with the plywood.
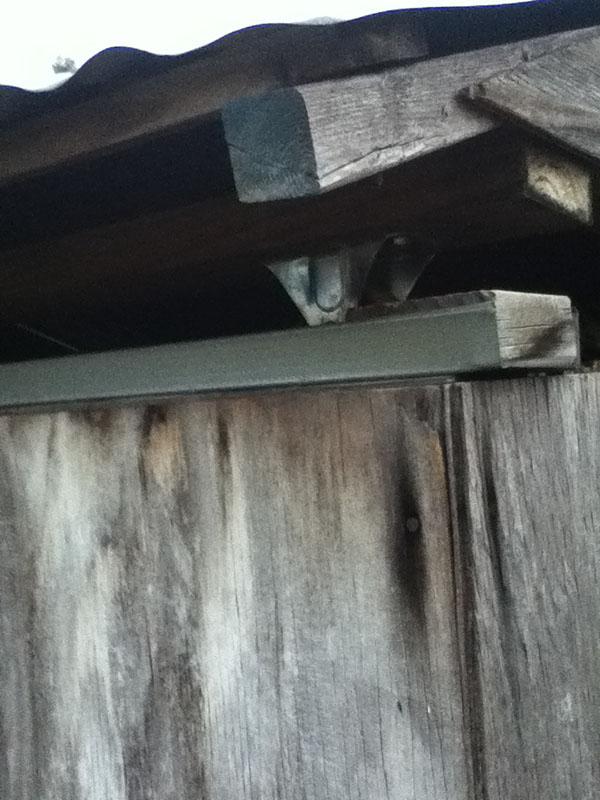
4) I get water in the observatory because of gaps between the roof and the walls on all sides. I think I can fix the gaps on the side by going up with 1x8's or something from the top of the outside bottom section. On the North side, I can probably go down with a 1x8 secured to the 2x4s that make up the bottom frame of the roof. But I'm at a loss what to do with the South side with the door.
5) I used wavy steel roof sheeting (whatever they call that stuff) for the roof. Unfortunately although I capped it with the piece they sold, and I used the waffle boards for it to lay on, on the side, those waffle boards did not hold up to exterior weather well and have fallen apart. This leads to gaps between the cap and the roofing, again which leak.
I'm thinking of pulling the roof on that side and putting down strips of 1x4 or 1x3 which I used on the other side and which have held up much better. While doing that, I have the obvious option to replace the roof material entirely. Any suggestions one way or the other.
Obviously I would rather not start over if I can avoid it. The roof DOES work and I remember what a pain making it in the first place was.
Thanks for any suggestions.
#2

Posted 14 January 2013 - 10:51 PM
#3

Posted 14 January 2013 - 11:04 PM
#4

Posted 15 January 2013 - 02:38 PM
#5

Posted 15 January 2013 - 06:32 PM
#6

Posted 15 January 2013 - 07:12 PM
Move the door to the north end, patio stone on packed sand works. Pour just a pad for the dob. then rebuild your south wall for full drop down. Carol solved the side leaks with garage door weather strip.
The idea about moving the door to the North is just the kind of thing I would never have thought of myself and that would solve so many problems. What a great suggestion!
#7

Posted 15 January 2013 - 08:35 PM
#8

Posted 16 January 2013 - 08:37 AM
Norm
#9

Posted 16 January 2013 - 10:06 AM
Not sure how tall your walls are but if they are tall enough an option might be, pour a pad for Dob, use 2x8 pressure treated floor joists and plywood floor isolated from pad
Norm
Unfortunately, the walls are only about 6' tall to keep sight lines better, so there really isn't room for doing that. Also I have some refractors, and that would put the eyepiece at very low levels.
#10

Posted 16 January 2013 - 10:25 AM
where the rocker box sits bare dirt.
I would never leave my dob on bare dirt. Moisture, plus mice, etc., finding their way in.
Unfortunately, the walls are only about 6' tall
That seems very high for a dob. My dobservatory has 3' high walls for my 16", to get as low to the horizon as possible.
Here is how I sealed the spacing between the roof & the walls, as Mary mentioned. I've never had any moisture whatsoever, even with my usual storms of "sideways" snow & rain storms. This is just garage door bottom stripping that I think comes in 9' lengths. I just stapled it on the top of the walls.
#11

Posted 16 January 2013 - 12:01 PM
where the rocker box sits bare dirt.
I would never leave my dob on bare dirt. Moisture, plus mice, etc., finding their way in.
Unfortunately, the walls are only about 6' tall
That seems very high for a dob. My dobservatory has 3' high walls for my 16", to get as low to the horizon as possible.
Here is how I sealed the spacing between the roof & the walls, as Mary mentioned. I've never had any moisture whatsoever, even with my usual storms of "sideways" snow & rain storms. This is just garage door bottom stripping that I think comes in 9' lengths. I just stapled it on the top of the walls.
"Great minds think alike." I also used garage door bottom molding between the walls and the roll off roof in my 11 year old observatory. Snow or rain has never made it past this flashing system.
#12

Posted 16 January 2013 - 12:12 PM
#14

Posted 16 January 2013 - 08:56 PM
Here's the thread......
http://www.cloudynig...5027475/page...
#15

Posted 16 January 2013 - 10:04 PM
I did the same,but even had to have mine transported. In the end, not much was left of the original, and I wasted a lot of time stripping old stuff off. It was probably a bad idea.
Here's the thread......
http://www.cloudynig...5027475/page...
Thanks. I'll need to read that thread.
Some more pics.
#19

Posted 16 January 2013 - 10:10 PM
#20

Posted 16 January 2013 - 10:44 PM
Dan in NY
#21

Posted 16 January 2013 - 10:53 PM
#22

Posted 16 January 2013 - 11:58 PM
The roof is the priority, I wouldn't do just the half that's failed but the whole thing. The corrugated metal is lighter than plywood and shingles and easier for one person to handle. You know now how to do it correctly so I'd just redo the whole roof. If any of the rafters seem a bit ratty you can sister new ones along side and screw the new roof into the sistered rafters. Replace the plywood gable ends with T-11 sheathing and prime and paint them. If you're going to move the door to the other end consider redoing the framing and use a pre hung door. It will make for a stronger wall. Since you say your carpentry skills are a bit iffy this is something I'd hire a finish carpenter for. He can cut and size the door to fit and make sure it's square. Replace the sheathing at that end with T-11 and prime and paint it and the door.
Before you reframe the other end, that is now without the door, do what ever "floor" work you're going to do. If you dont want to pour a slab for the Dob consider one of those pre cast units they use to set A/C units on. You can do the rest in pavers, just leave a gap so they don't touch the base for the Dob. Reframe and resheath the end wall with T-11, prime
and paint.
As money and time permit you can resheath the side walls with T-11 and prime and paint them as well. Correct the grade around the Obs so that water from the roof and surrounding area is directed away from the walls. If you know what a French Drain is this would be a good idea for around the perimeter. An 18 inch gravel border around the Obs will keep mud and water from splashing up on the walls. Apply a waterproof coating to the bottom 18" of the walls as well as 18" metal flashing.
If you feel your skills are up to ir make and install some corner shelving out of MDF. You can make a desk, some storage, eye piece racks etc. These will help keep the corners square as well as providing you with useful areas. Use hefty angle brackets to tie the top and bottom corners of the walls to each other. Sister any weak or iffy wall studs. Use Carols garage door weather stripping trick to keep out wind, rain and tiny UFO's.
Hope this helps.
#23

Posted 17 January 2013 - 12:14 AM
#24

Posted 17 January 2013 - 12:48 AM
I've seen pix of your Obs, no bad money there!Aahh I was never much of one for throwing good money after bad. Start over and do it right.
Mike
Whatever his decision, all the best to him.
#25

Posted 17 January 2013 - 08:56 AM
I don't know how long it's been since you built it but for an on grade unpainted structure it's still standing which says something for the initial build skills! If the roof rolls smoothly and the walls aren't racked I'd consider refurbishing it rather than starting over.
The roof is the priority, I wouldn't do just the half that's failed but the whole thing. The corrugated metal is lighter than plywood and shingles and easier for one person to handle. You know now how to do it correctly so I'd just redo the whole roof. If any of the rafters seem a bit ratty you can sister new ones along side and screw the new roof into the sistered rafters. Replace the plywood gable ends with T-11 sheathing and prime and paint them. If you're going to move the door to the other end consider redoing the framing and use a pre hung door. It will make for a stronger wall. Since you say your carpentry skills are a bit iffy this is something I'd hire a finish carpenter for. He can cut and size the door to fit and make sure it's square. Replace the sheathing at that end with T-11 and prime and paint it and the door.
Before you reframe the other end, that is now without the door, do what ever "floor" work you're going to do. If you dont want to pour a slab for the Dob consider one of those pre cast units they use to set A/C units on. You can do the rest in pavers, just leave a gap so they don't touch the base for the Dob. Reframe and resheath the end wall with T-11, prime
and paint.
As money and time permit you can resheath the side walls with T-11 and prime and paint them as well. Correct the grade around the Obs so that water from the roof and surrounding area is directed away from the walls. If you know what a French Drain is this would be a good idea for around the perimeter. An 18 inch gravel border around the Obs will keep mud and water from splashing up on the walls. Apply a waterproof coating to the bottom 18" of the walls as well as 18" metal flashing.
If you feel your skills are up to ir make and install some corner shelving out of MDF. You can make a desk, some storage, eye piece racks etc. These will help keep the corners square as well as providing you with useful areas. Use hefty angle brackets to tie the top and bottom corners of the walls to each other. Sister any weak or iffy wall studs. Use Carols garage door weather stripping trick to keep out wind, rain and tiny UFO's.
Hope this helps.
Thanks for the very detailed advice. The original build was done back in 1992. The original roof was not secured properly and blew off in a huge storm associated, if I recall correctly, with a Hurricane. I think it was maybe Emily in 1993. I then redid the roof with rubber rollers, plywood, and shingles. That was a very bad idea. It was too heavy and the rubber rollers cracked under the weight. Finally I redid it with the steel roof and metal rollers, so this has been my third (and by far the longest lasting) roof.
I haven't used the structure much lately because the mirror in my Dob needed recoating. I got that done back in December (Majestic) and so I need to get this back in useable, and preferably much better condition than before.
I probably can use a pre-hung exterior door since my Dob needs about 33-34 inches of clearance, and exterior doors are about 36. The height of the door is a problem, I'll need to think about how to deal with that.


