

Pop-Up Canopy Observatory
Discuss this article in our forums
Pop-Up Canopy Observatory
By: Charles R Genovese Jr MD 10/2/2017
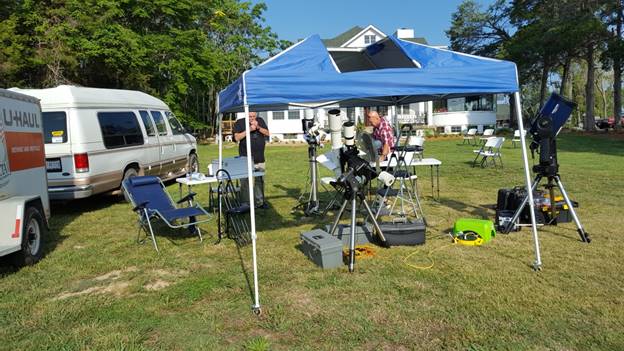
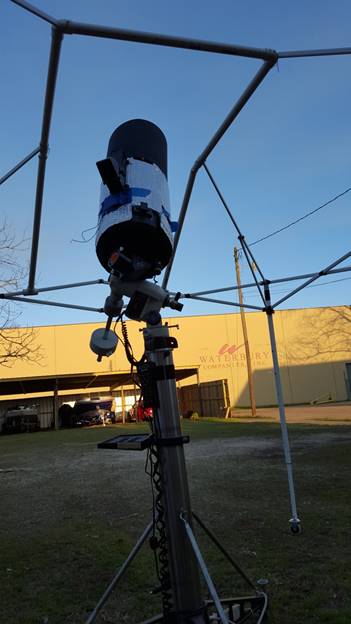
Having been born with a “Tinker Gene” it occurred to me some time ago that rather than just cover the adjunct scope equipment with a pop up canopy to prevent the inevitable dew we have here in the South that an inexpensive canopy could be easily modified to make a portable observatory. I built this one last year and I have been very pleased with the result at night and additionally I found it was hugely helpful providing shade for Solar observing and I thought I would share it.
I started with a common 10 foot canopy from Academy Sports that cost less than $100. The brand is not important but the ribs for the top must originate from the corners. First remove the canopy material and then remove the center spider by removing the screws at the hinge in the middle of the rib which leaves 4 struts that extend from each corner half way to the peak.
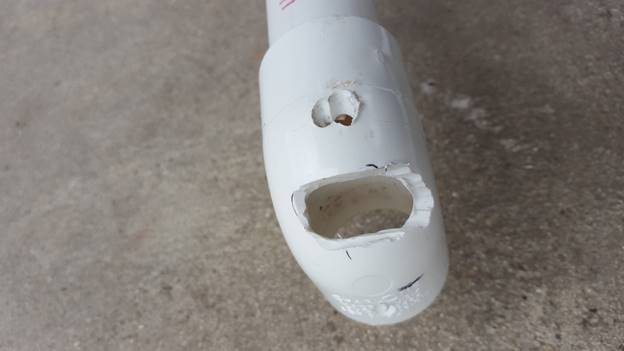
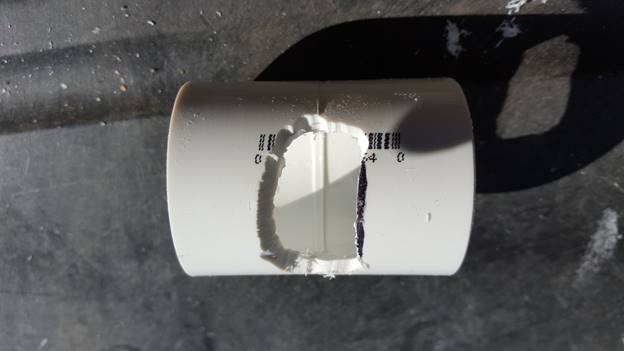
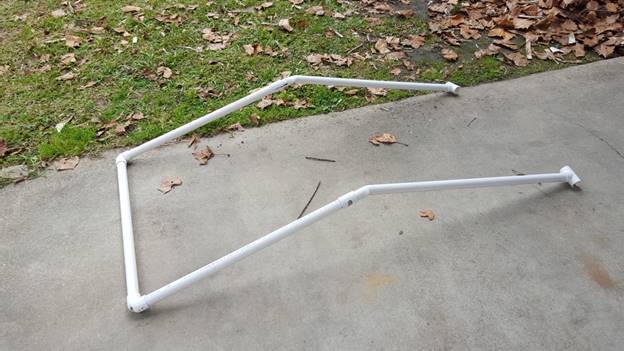
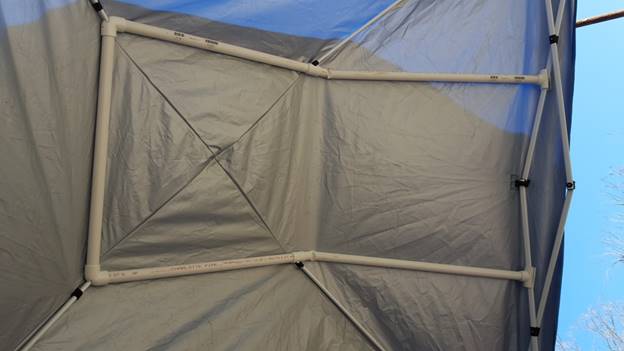
Obtain the following 1” PVC fittings- 2 right angles, 2 in line connectors, 2 T’s and about 8 feet of straight pipe. I just eyeballed about where the struts would go into the 2 right angles and 2 straight connectors and cut slots with a 4” grinder.
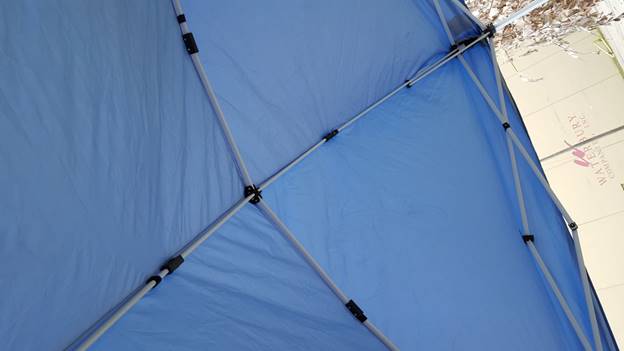
Next I cut the connecting straight pieces, and used a heat gun to soften the two side pieces and bent them to the eyeballed angle. Finally I cut a slot in the T pieces at the ends. When put together it looks like this :
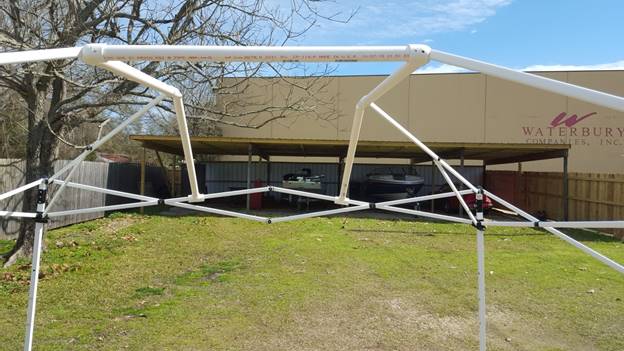
and when installed on the frame it looks like this.
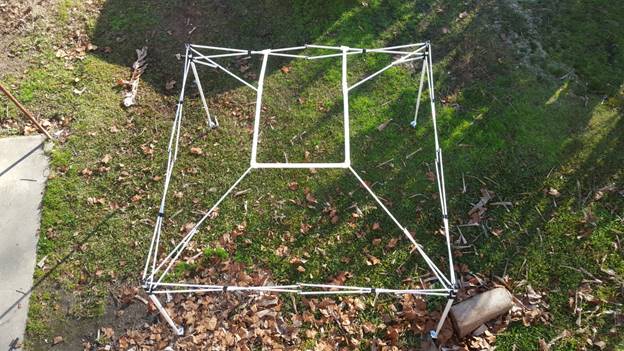
One more view from above:
Next reinstall the canopy and use a marker to indicate the cuts. Be sure and leave a flap in the center of the cut that can wrap around the PVC frame which is secured with velcro.
The part to be removed…
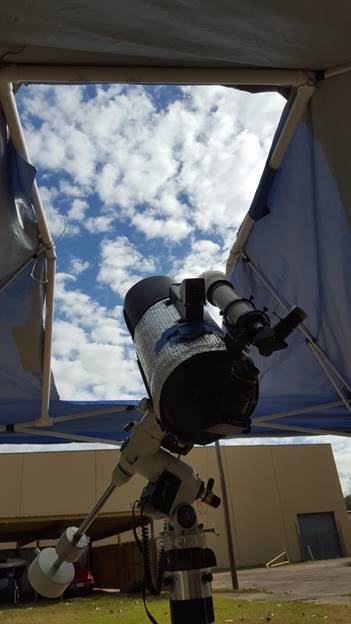
Use 2” Velcro from Loews on the flap and PVC to anchor the canvass. I sealed the cut edges of the fabric by heating it with a heat gun. This reinforces the corners (cut them a little round rather than a sharp corner- they are less prone to tearing) and keeps the cut edges from unraveling. Practice on the cut out center piece to get the correct amount of sealing without melting it.
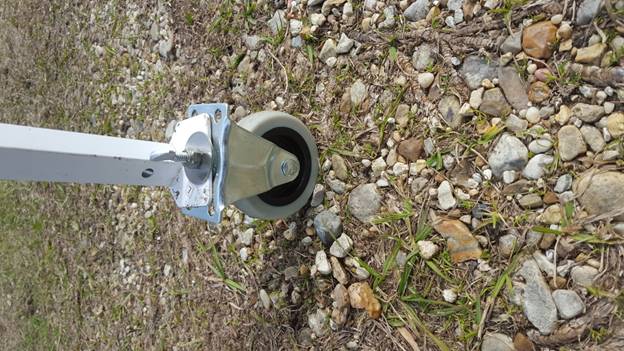
Finally the whole thing needs to rotate. It is easy enough to lift a couple of legs at a time and alternate between each side but I put 2 1/2 “wheels on each corner. I drilled out the hole in each foot slightly to allow the flange of a ¼-20 T nut to stick through and drilled a similar hole in the mounting plate of each wheel. One washer takes up the slack and a thumb screw completes it. To rotate the structure of course each wheel is angled about 45 degrees, but if you wanted to move the canopy to another location they could all be turned in one direction, and also when opening or closing the canopy by yourself it is helpful to turn the wheels radially.
The last step is to have a cover for the observatory opening. There are several ways this could be done but a present I have a 10x10’ tarp that is loosely held in place with several pieces of light rope tied at the back two corners opposite the slit, with enough slack on the slit side that it can be pulled back enough to uncover the opening. There are two pieces of rope tied to the leading edge of the tarp that covers the slit-one runs to the back and when pulled will uncover the slit and another that runs in the other direction to pull it closed.

Pre-cut side walls are also available from Academy and they have Velcro straps that attach to the structure in seconds. I also drilled additional holes for the spring loaded clips in the legs that allow the height to be adjusted lower as desired. Because the walls are relatively high relative to the roof this design works better for scopes on higher piers.
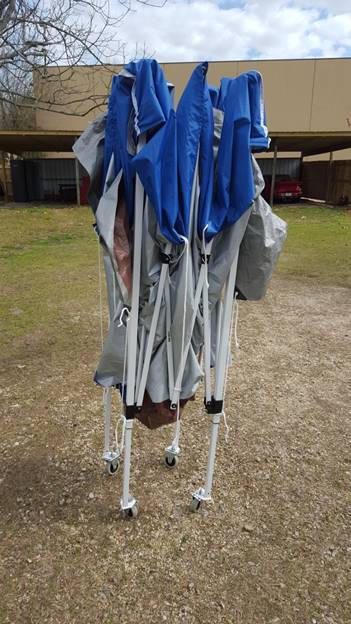
To take it down simply remove the tension fit PVC parts (the canvas and the tarp cover can stay in place) and fold it up- takes about one minute!
The total cost was only about $150 and only simple inexpensive hand tools were used.
One other alternate use for these canopies is to just remove the roof entirely (better for viewing the whole sky) and just hang the side curtains on the structure for a light shade – both to block neighborhood lights and to use at star parties in order to block the lights from my computer to others. I had an old extra canopy lying around and made one of those to use at the Deep South Star Gaze (which is in a couple of weeks from this writing).
If there are any questions please PM me.
Charles R Genovese, Jr MD
- BobBates, Chopin, JMP and 21 others like this


0 Comments