Jump to content

  •  

CNers have asked about a donation box for Cloudy Nights over the years, so here you go. Donation is not required by any means, so please enjoy your stay.

Photo

An 8-Inch Cave Cassegrain

This topic has been archived. This means that you cannot reply to this topic.
42 replies to this topic

#1 astro140

astro140

    Mariner 2

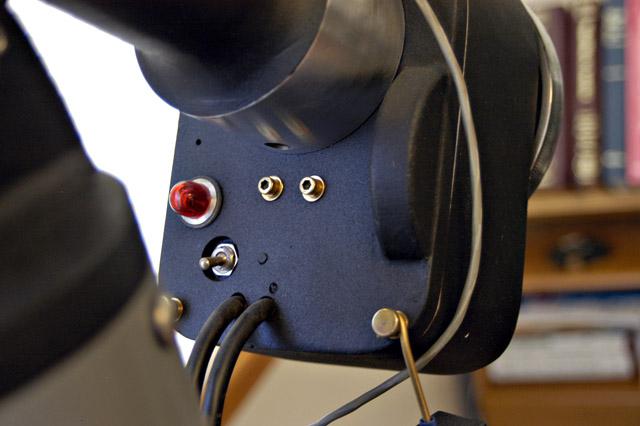
  • *****
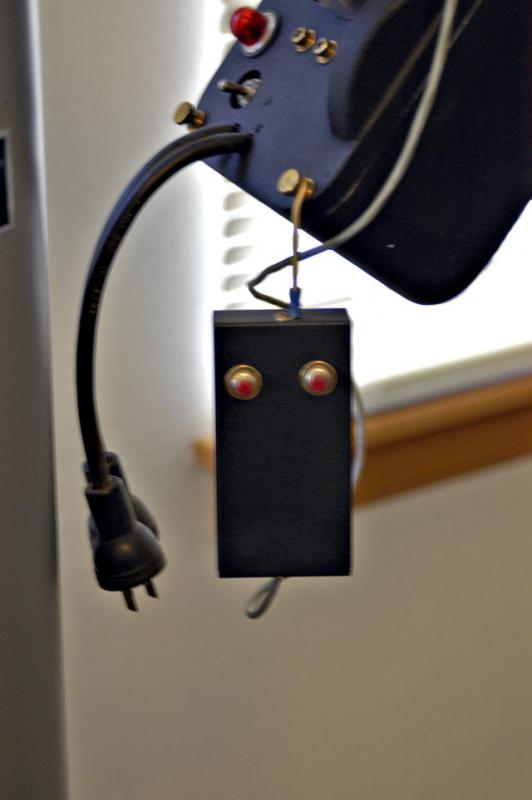
  • topic starter
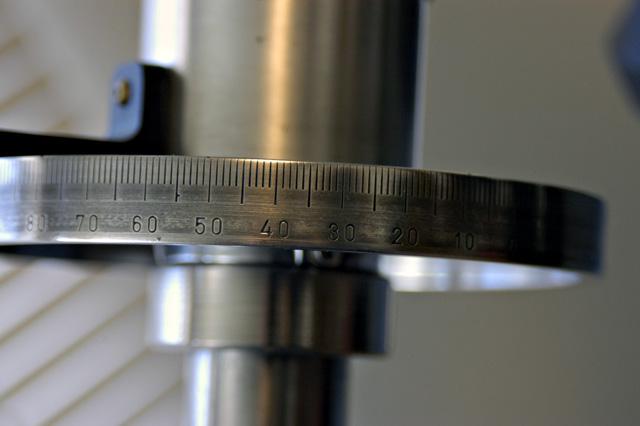
  • Posts: 283
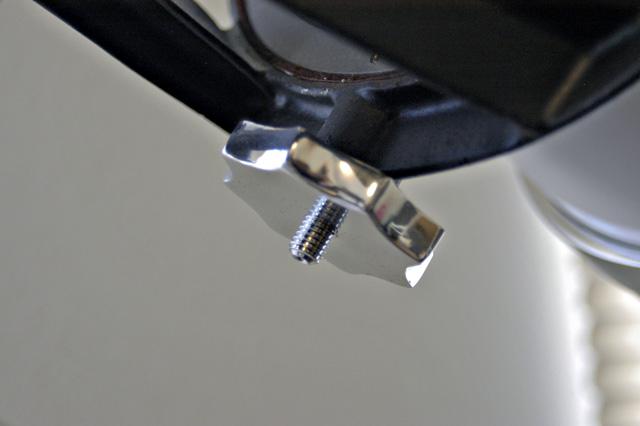
  • Joined: 28 Jan 2008

Posted 03 February 2011 - 08:10 PM

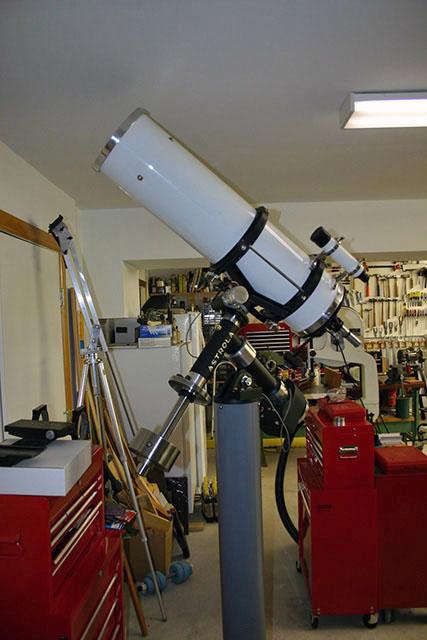
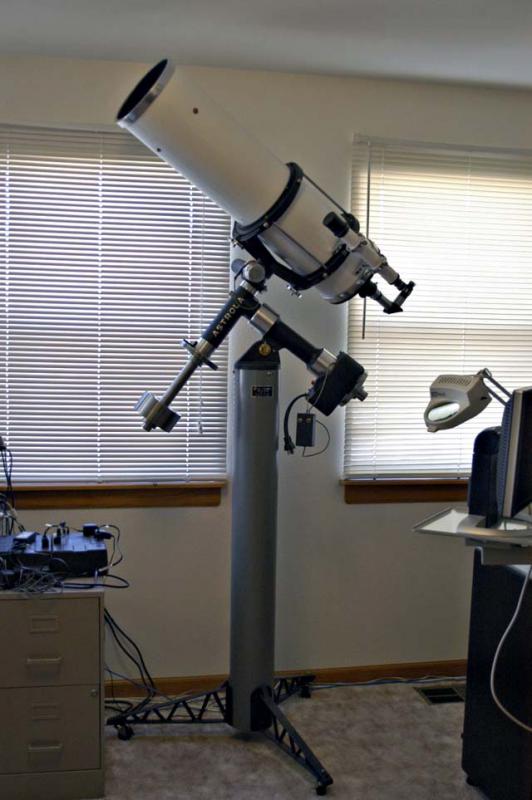
I purchased this 8-inch Cave Cassegrain telescope in approximately 2007 off an astronomy club in Pennsylvania. It was not being used and from the information that I received it lived for many years in a basement and finally in a barn…where it was when I picked it up. Although I live in New Mexico I was planning on a driving trip to New Jersey to visit my family. I put a down payment on the scope and picked it up the following spring. I remember in the 60’s looking at a Cave Catalog (which I still have) wishing I had a “Cassegrain.” Finally I would have a chance to restore one. Needless to say the scope needed work…rusty pier, counterweight, and DEC shaft; cracked aluminum end rings, cracked mirror mount, most of the paint had fell off, etc., etc. The mirror set was okay (however, I still need to send it out for a recoating). The mirror was signed “Cave Optical Co. MF 738571 F4 Elip 31 ¾” Nov 1, 1973”. Unfortunately, I do not have a picture of the scope in its un-restored state…. I worked on it slowly on an off and finally finished it the end of last year…..so you will get to see the final results. I have to thank the many individuals who posted information on this forum concerning the restoration of their Cave Telescopes.

Attached Thumbnails

  • 4361574-Cave 8 inch Cassegrain.JPG


#2 tim53

tim53

    James Webb Space Telescope

  • *****
  • Posts: 17,057
  • Joined: 17 Dec 2004

Posted 03 February 2011 - 08:12 PM

Very nice job!!!

#3 astro140

astro140

    Mariner 2

  • *****
  • topic starter
  • Posts: 283
  • Joined: 28 Jan 2008

Posted 03 February 2011 - 08:12 PM

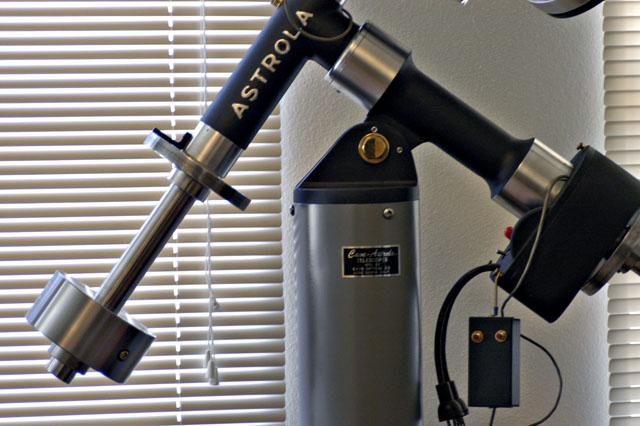
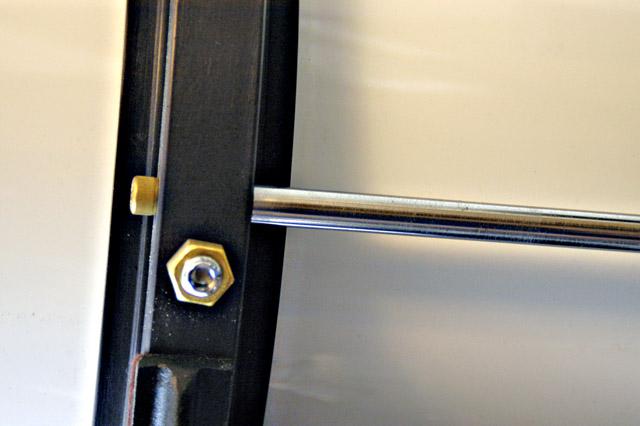
The mount was disassembled and the DEC and RA axes that were exposed polished using fine emery cloth and a buffing wheel. The section of the axes that were enclosed in the mount (and in the bearing) were untarnished and were only cleaned of dirt and hardened grease. The mount had no paint left on it (I suspect it was originally gray). I painted it black (Rust Oleum primer and paint)….a future restorer can always change the color….but I liked the black color scheme that Cave used on many of their reflectors. The outside bearing housings were polished and the corroded altitude pivot bolt replaced by a brass bolt (end of the bolt finished on a lathe to remove the manufacturing marks). All the “nuts and bolts” on the mount were replaced by brass, chromed, or stainless steel equivalents (McMaster-Carr)

Attached Thumbnails

  • 4361583-Mount.jpg


#4 astro140

astro140

    Mariner 2

  • *****
  • topic starter
  • Posts: 283
  • Joined: 28 Jan 2008

Posted 03 February 2011 - 08:13 PM

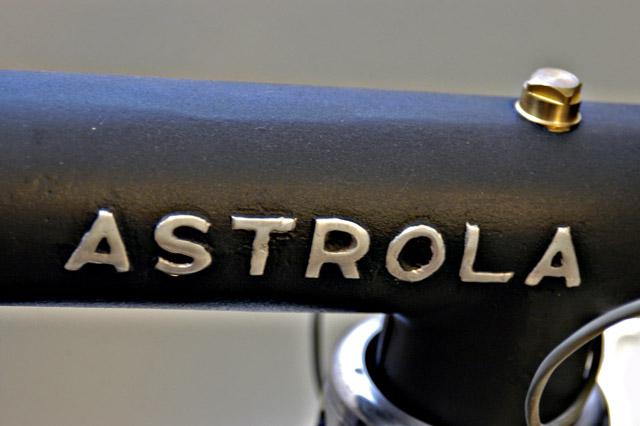
The ASTROLA logo was polished using a Dremel tool and masked off during painting. The “plug” that allows access to the Allen head bolt attaching the DEC assembly to the RA shaft (after removal of the DEC axis) was replaced by a brass plug.

Attached Thumbnails

  • 4361585-DEC housing.jpg


#5 astro140

astro140

    Mariner 2

  • *****
  • topic starter
  • Posts: 283
  • Joined: 28 Jan 2008

Posted 03 February 2011 - 08:15 PM

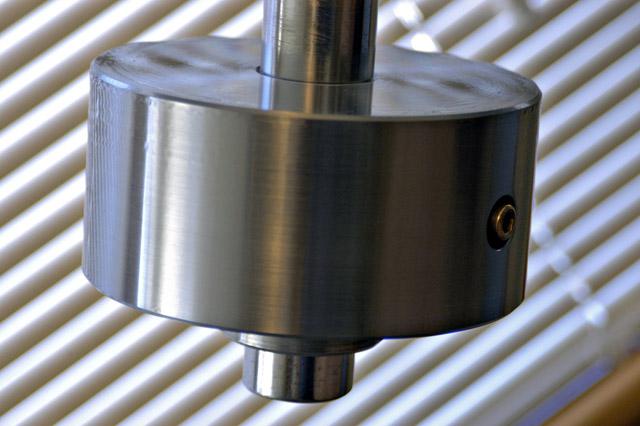
The rusted counter weight was turned on a lathe, polished, and protected with a coat of clear enamel.

Attached Thumbnails

  • 4361589-Counterweight.jpg


#6 astro140

astro140

    Mariner 2

  • *****
  • topic starter
  • Posts: 283
  • Joined: 28 Jan 2008

Posted 03 February 2011 - 08:16 PM

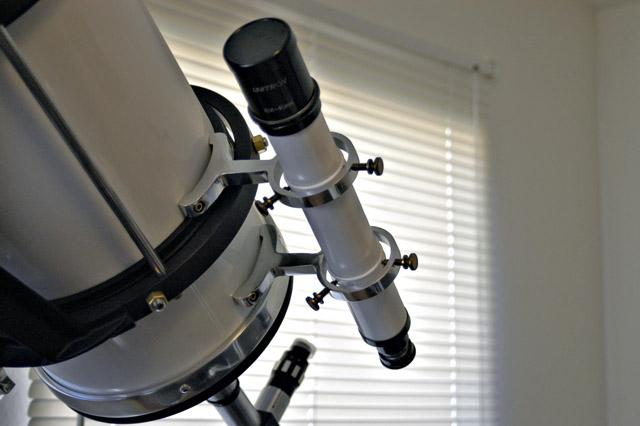
The finder rings had a bit of black paint still adhering to them. I removed the remaining paint (took a few thousands off the flat corroded surface with a milling machine) and polished them. They looked good so I left them as is…they could always be painted at a later date.

Attached Thumbnails

  • 4361592-Finder.jpg


#7 astro140

astro140

    Mariner 2

  • *****
  • topic starter
  • Posts: 283
  • Joined: 28 Jan 2008

Posted 03 February 2011 - 08:17 PM

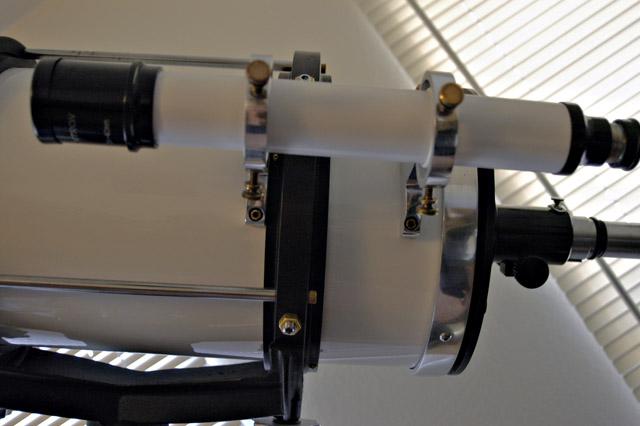
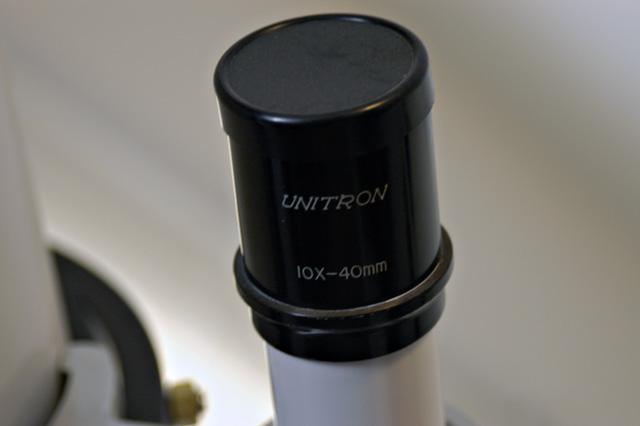
The finder that came with the scope was a Unitron 10X40mm

Attached Thumbnails

  • 4361593-Unitron 10 X 40 mm Finder.jpg


#8 astro140

astro140

    Mariner 2

  • *****
  • topic starter
  • Posts: 283
  • Joined: 28 Jan 2008

Posted 03 February 2011 - 08:19 PM

Did the Unitron finder come standard on some scopes?? I have a 10-inch Cave Newtonian reflector that came with (I am not the original owner) a Vernonscope 10 X 40mm finder. I do have a standard Cave Astrola finderscope also.

Attached Thumbnails

  • 4361596-Unitron Finder.jpg


#9 astro140

astro140

    Mariner 2

  • *****
  • topic starter
  • Posts: 283
  • Joined: 28 Jan 2008

Posted 03 February 2011 - 08:21 PM

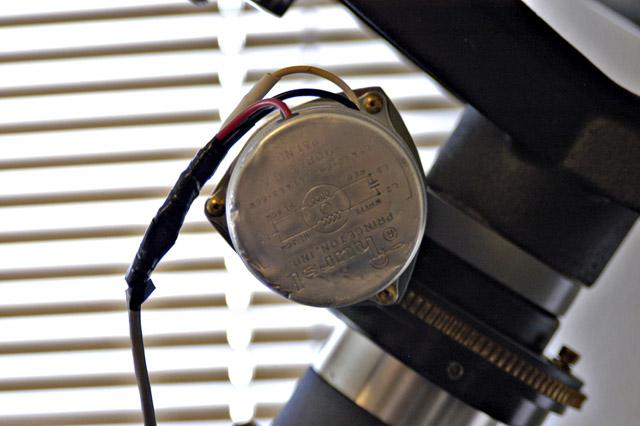
The DEC motor housing was taken apart, cleaned, and the gears regreased.

Attached Thumbnails

  • 4361598-DEC Motor.jpg


#10 astro140

astro140

    Mariner 2

  • *****
  • topic starter
  • Posts: 283
  • Joined: 28 Jan 2008

Posted 03 February 2011 - 08:22 PM

The same was done with the RA motor housing and gears. All the electrical wires were replaced.

Attached Thumbnails

  • 4361602-RA Motor Housing.jpg


#11 astro140

astro140

    Mariner 2

  • *****
  • topic starter
  • Posts: 283
  • Joined: 28 Jan 2008

Posted 03 February 2011 - 08:24 PM

I made the little hook to hang the hand controller.

Attached Thumbnails

  • 4361603-Hand Control.jpg


#12 astro140

astro140

    Mariner 2

  • *****
  • topic starter
  • Posts: 283
  • Joined: 28 Jan 2008

Posted 03 February 2011 - 08:25 PM

The setting circles were cleaned and polished. The indentations and numbers were redone with a fill-in paint stick

Attached Thumbnails

  • 4361606-DEC Setting Circle.jpg


#13 astro140

astro140

    Mariner 2

  • *****
  • topic starter
  • Posts: 283
  • Joined: 28 Jan 2008

Posted 03 February 2011 - 08:25 PM

The cradle locking nuts were corroded with some black paint still present. They were cleaned and polished and left as is.

Attached Thumbnails

  • 4361609-Cradle Locking Nut.jpg


#14 astro140

astro140

    Mariner 2

  • *****
  • topic starter
  • Posts: 283
  • Joined: 28 Jan 2008

Posted 03 February 2011 - 08:26 PM

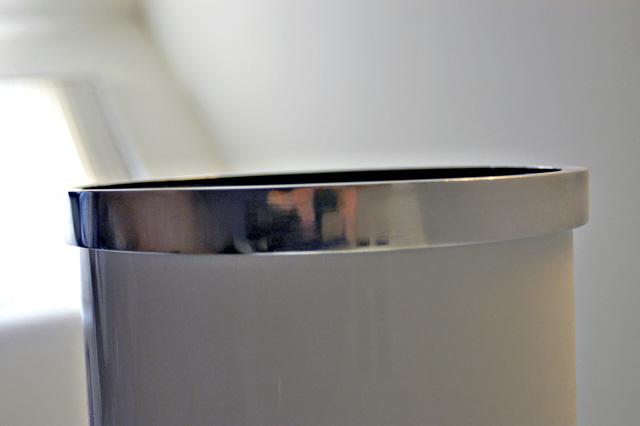
The rotating rings (some black paint still present) was cleaned, polished, and then black anodized. The support rods were cleaned and polished on a lathe.

Attached Thumbnails

  • 4361614-Close-up Rotating Rings.jpg


#15 astro140

astro140

    Mariner 2

  • *****
  • topic starter
  • Posts: 283
  • Joined: 28 Jan 2008

Posted 03 February 2011 - 08:27 PM

The front-end ring was cracked and broken through. I considered “glue” but instead had it aluminum welded at a local machine shop. After cleaning and polishing you would never know that it was broken.

Attached Thumbnails

  • 4361615-Front Tube Ring.jpg


#16 astro140

astro140

    Mariner 2

  • *****
  • topic starter
  • Posts: 283
  • Joined: 28 Jan 2008

Posted 03 February 2011 - 08:28 PM

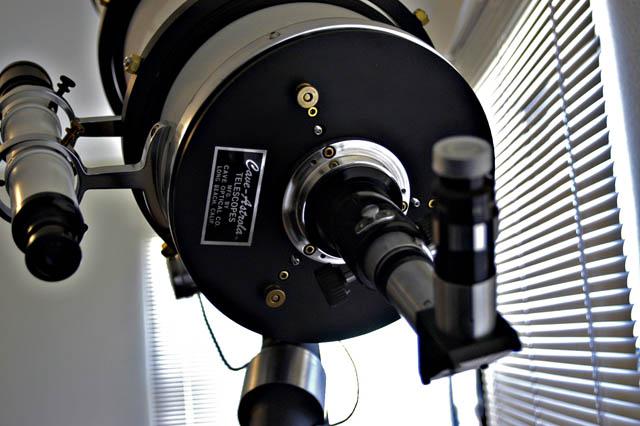
The back plate was cleaned, polished, and black anodized. The mirror mount that was attached to the plate had a crack in it that was repaired with an aluminum weld. The scope has the deluxe Unitron focuser that was standard with these scopes. The aluminum spacer plate has push-pull screws for squaring the focuser.
Back plate

Attached Thumbnails

  • 4361617-Back Plate.jpg


#17 Lew Chilton

Lew Chilton

    Vanguard

  • *****
  • Posts: 2,226
  • Joined: 20 Oct 2005

Posted 03 February 2011 - 08:28 PM

Steve,

You did an absolutely beautiful job and you are an inspiration to the rest of us!

#18 astro140

astro140

    Mariner 2

  • *****
  • topic starter
  • Posts: 283
  • Joined: 28 Jan 2008

Posted 03 February 2011 - 08:29 PM

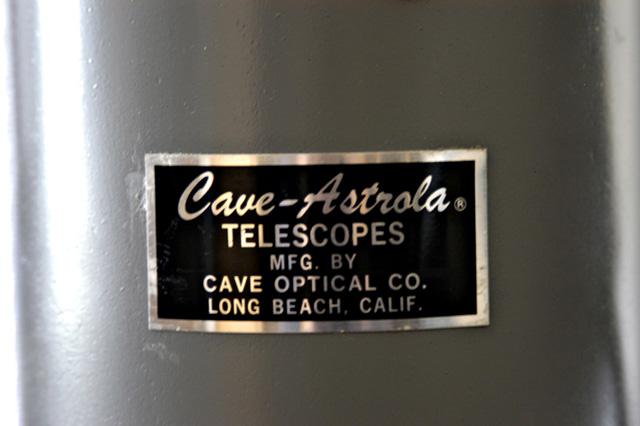
Cave emblem on both the pier and end plate. The pier was sandblasted prior to re-painting.

Attached Thumbnails

  • 4361620-Label on Pier.jpg


#19 astro140

astro140

    Mariner 2

  • *****
  • topic starter
  • Posts: 283
  • Joined: 28 Jan 2008

Posted 03 February 2011 - 08:31 PM

Pictured here in my “computer room” is the final product…well the mirrors still need to be re-coated. The coatings would probably work…. but being a perfectionist when it comes to some matters <G>. How much did this restoration cost…Please Don’t Ask!!! Well, will I ever use the scope or will it be a “museum” piece in my house? Not to worry…life is good…. I have a 10-inch f/7 Cave in my observatory.

Steve,
NM

Attached Thumbnails

  • 4361621-8-Inch Cave Cassegrain.jpg


#20 albert1

albert1

    Mercury-Atlas

  • *****
  • Posts: 2,662
  • Joined: 01 Jan 2007

Posted 03 February 2011 - 08:33 PM

I assume you are still posting photos. Looks really sharp. A labor of love.

#21 Abbe

Abbe

    Vostok 1

  • -----
  • Posts: 188
  • Joined: 08 Sep 2009

Posted 03 February 2011 - 08:58 PM

Hi Steve,

Beautiful job on the scope. I hope you post something about the performance when you get the optics re-coated. I have one of the Cave Transportable 12.5-inch mounts with the big pedestal that I need to restore. Cave must of had a sense of humor when he called it transportable. The difference between it and the other Cave mounts with 1.5-inch shafts is the bigger clock drive and pedestal. Enjoy your scope!

George :)

#22 rfic1

rfic1

    Viking 1

  • *****
  • Posts: 668
  • Joined: 25 Oct 2005

Posted 03 February 2011 - 09:11 PM

Outstanding job

#23 Datapanic

Datapanic

    Soyuz

  • *****
  • Posts: 3,828
  • Joined: 17 Oct 2009

Posted 03 February 2011 - 09:13 PM

Beautiful! The brass fasteners really accent it well.

#24 Ham Radio

Ham Radio

    Viking 1

  • *****
  • Posts: 702
  • Joined: 18 Sep 2009

Posted 03 February 2011 - 09:48 PM

Sure looks like a great scope.. Hope it works as well as it looks!

#25 gelkin

gelkin

    Surveyor 1

  • *****
  • Posts: 1,675
  • Joined: 22 Sep 2010

Posted 03 February 2011 - 09:49 PM

Excellent work. You have done a beautiful job. :bow: :bow: :bow:

Gerald


CNers have asked about a donation box for Cloudy Nights over the years, so here you go. Donation is not required by any means, so please enjoy your stay.


Recent Topics


Cloudy Nights LLC
Cloudy Nights Sponsor: Astronomics